Hello crafty friends, and this is something completely different for me today.
I've always envied all the beautiful mixed media projects that I've seen on social media and thought that I'd have a go with the wonderful array of products that we have available from Nikky at Polkadoodles.
This is a pic heavy post but I do hope that if, like me, you've wanted to dip your toes into the world of mixed media but found it all a bit daunting, it will help.
So firstly, this is the finished project ...

I cannot tell you how much I enjoyed putting this together.
It's a world I could get completely lost in.
So this is a list of products I used -
Dies -
Posydoodles Basics - Tags
Delicate Daisy Border
Butterfly Trio
Stamps –
Textures Galore stamp set
Paper
6x6" Paper Pack - Posy Doodles
Plus ....
MDF heart
White Gesso
Gel medium or strong glue
White voile
White napkin or tissue paper
Clear glitter
Tonic shimmer powders in Falling Leaves, Solar Flare & Cherry Bomb
Nuvo Drops or liquid pearls (or even gem stones - whatever you have)
Watercolour paper or card
White ribbon
Ink pad
OK so let's start this bad boy!!
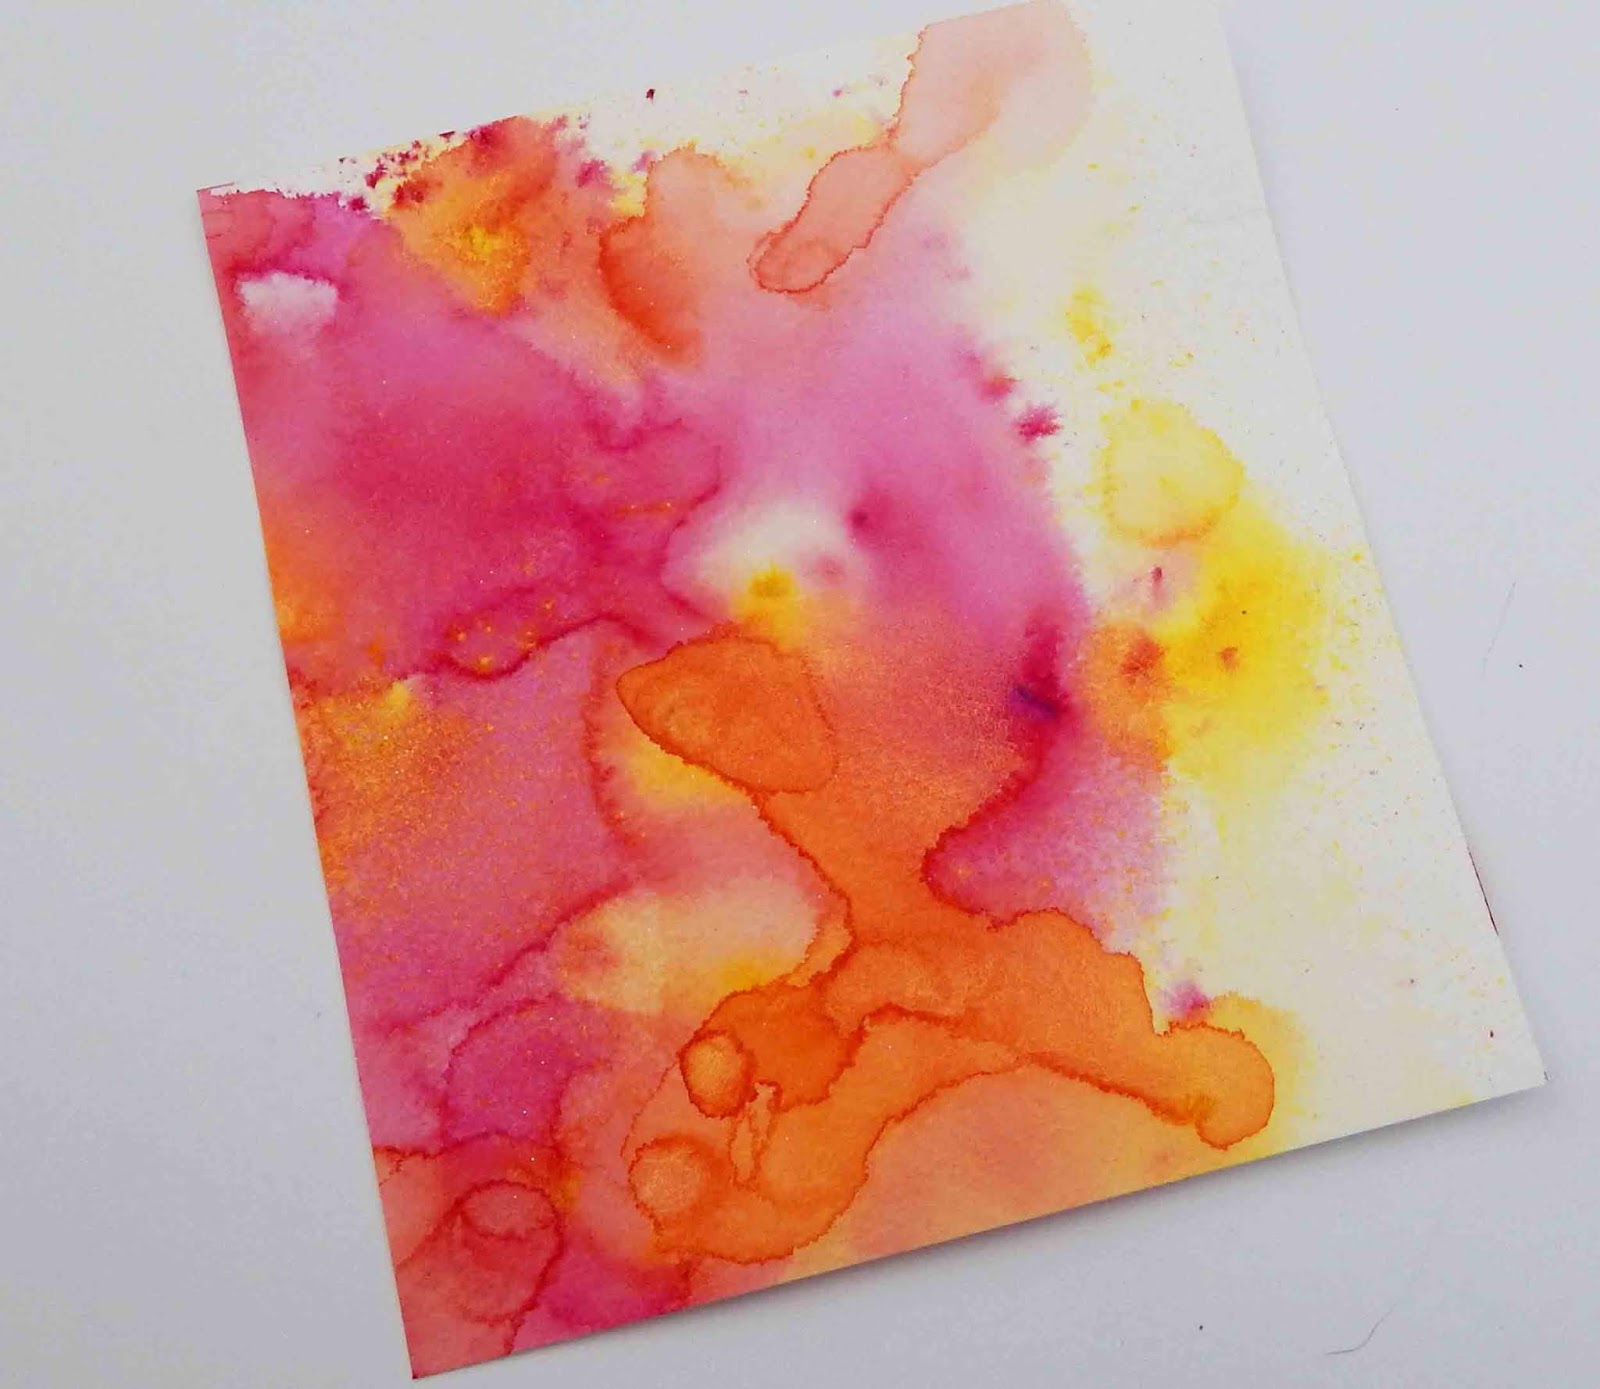
Firstly I made up my paper by spritzing some watercolour card and adding the shimmer powers to create my design. It really doesn't matter how you do this - no wrongs or rights here, just have a play and get some colour onto your card.
You could also use watercolour pens, Distress Ink pads, whatever you have to hand really. But it's best if it's a water based product so you can spritz / dilute it down and move it around a bit.

Now cover your heart with a sheet of the Posydoodles paper.
I used gel medium to stick it down with because it was on my desk, but you could use anything.

If your heart is a little bigger than 6" in length, just chop a bit off and add it to the bottom.
It doesn't matter for this is you have a join and don't forget to poke the hole through the paper at the top so you can add the ribbon later. I (cough cough) forgot to do this on my first outing!!

Now separate the napkin so that it is single ply and scrunch it up.
Add your gel medium or glue to the heart and layer the napkin onto it, scooting it up so that it forms ridges and wrinkles. Add as much or as little napkin as you want, let it dry and then file off the overhang-ey bits.

Now add a layer of white gesso.
Add this by dry brushing, so put the gesso onto your brush and wipe most of it off onto a spare bit of napkin or whatever you have laying about. A wide flat brush is fab for this bit. You can add this onto the paper as well if you want, but I found that less is more here because we are going to add another layer of gesso later on, and you still want to see the gorgeous paper.
Let it dry or give it a blast with the heat gun if you are impatient like me!!

Now for a bit of colour.
Whatever you used to colour your paper with in the first step is what you will use here. You just want to add it here and there and then give it a spray of water so that it moves about. I found that by doing this is little bits rather than adding all the colour at once, you get a nicer effect with no muddy patches of colour works. You can just dry it in between layers of colour.

Now choose the stamp you want from the texture pack.
Any one of them would work here which is why it's such a useful addition to your stash. Ink it up and add it randomly over the project. I didn't bother putting it into a stamp block - I just held in in my hand, dabbed it onto the ink pad and pressed it down.
Give it a blast with the heat gun or let it dry, then dry brush all over with a bit more gesso .
Put it to one side while you get the dies out.

Grab the card you coloured in step 1 and die cut the following -
For each flower, you want 4 layers of the largest die in the set. If you want a smaller flower, or if your heart is smaller, just use the next size down. Cut a Delicate Daisy border and butterfly from the coloured card and then the rounded tag from the tag set from white card.
I also cut some leaves out which I forget to add to the pic here!!
When you've cut them out, colour them and add a dash of glitter.

I saw a tutorial for making these flowers from my lovely friend Debbie Dolphin and it really inspired me. I took the four die cuts and ran an embossing tool over them to break up the card fibres. Then I cut a slit in 3 of them.

I rolled one of the cut pieces around a skewer and glued it together.

Then I wrapped the other 2 cut pieces around that and glues them on. And finally I stuck that down onto the uncut piece.

A little bit of gesso and clear glitter and we are done.
You need to make 2 more.

I stuck a bit of voile on the left hand side of the heart (which you can't see here!!) then the die cut border and butterfly on the right hand side. Lastly, I added the flowers and leaves.

The sentiment was cut from the paper pack and stuck down onto the tag. I ran a bone folder under it to give it some curl and then stuck it onto the heart.You can see the voile here and also the Nuvo drops which I added to the centre of the border die cut.
And that, my loves, is that finished.
I hope this has inspired you to have a go. The beauty of the Polkadoodles range is that there are so many things you can mix and match with so if you don't have everything here, just have a go with what you do have. It's bound to look fabulous.
Happy crafty hugs, Dawny P xx


No comments:
Post a Comment