Showing posts with label craftmania. Show all posts

Friday, 4 February 2022

Let's Make A Scene!!


Hello lovelies.

I've been playing with the Distress Inks again and this time I used them alongside some stamps sets from Creative Expressions.


The stamp sets I used are  


and here's the finished card ...


I wanted it to look like a sunrise (or sunset) and I quite like that you could use this for lots of occasions.

I've done a video which shows you in real time how I used the inks and what stuff I used and you can see it here - 

https://youtu.be/d5HUXVVaQKU

I hope you find it useful if this is something you  fancy having a go at and I've also gone through the products etc on it as well.


Here's a few more pics


I just love that sentiment!! 


So that's me done for today. 
Take care and have a fabulous weekend. 

Hugs, Dawny xx


Thursday, 3 February 2022

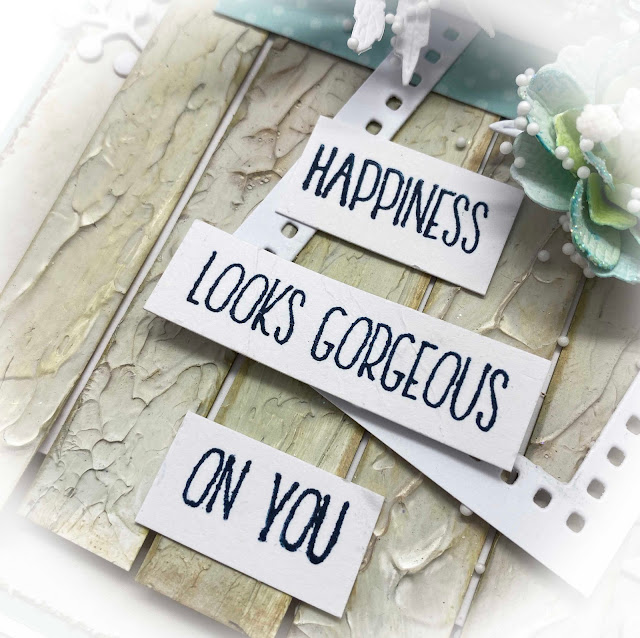
Shabby Chic Happiness :)


Hello lovelies and hope you are OK today.

There's a lot going on with this card today but I'll try and keep it as simple as I can.

I  will do a video for this because it's much easier to do than I can explain in words.


So ...


... this is the finished card. 

I've concentrated on making the faux wood here but I'll do the video this week to show you in detail how the card fits together.

 I've left a shopping list for you at the end for the stuff I used but if you haven't got all the bits and bobs, just have a mooch in your stash because you can always swap what I've used for something you have.

It's shabby chic so it doesn't have to be absolutely perfect.


Doesn't this faux wood look fab?

So to make it, take a sheet of watercolour card and using a palette knife or whatever you have to hand and spread the texture paste over the card.  (watercolour card works best because of the water content in the products used). You're aiming for uneven layers so vary how thick you apply it. 

Once you've done that, take your palette knife or something with a straight edge - thick cardstock would do - and make lines in the paste with the side of the knife. Also dab the paste to create little peaks - you want this to look as textured as you can get it. Once you're happy, leave it to dry - I left mine overnight.

Once it's dry, depending on the texture paste you used, you might want to make it look a little less shiny so just give it a coat of white gesso if you need to and again leave to dry.

Once dry, cut into strips then use Walnut Stain and Peeled Paint inks or the colours of your choice to colour the surface. I used a blending brush for this but a smoothie would work.

Stick the strips down onto a bit of waster card smaller than the overall size of the strips to make it easier to add to the front of the card when we come to do that. 

If you want to make the ends lie a bit uneven feel free - it looks nice like this I think.

'


More French Marigold flowers - I am addicted to this die set at the mo. This time I added some stamens I found in my stash but you don't have to add them.  They look gorgeous with or without.


I used silicone glue to stick  the flowers, twine  and leaves down and once I'd completely finished, I sprinkled some of those little polystyrene balls over it - this sticks to any bits of the silicone glue that's bare. This is a great tip I got from Anna Marie - it's a fabulous cover up.


And there we have it. 

I'll post on here when I've done the video but I'll get it done asap.

I'll say goodbye and leave you with the shopping list.
Take care and stay safe,

Hugs, Dawny xx


Wednesday, 2 February 2022

Elegance, Dreams and Fairy Wishes


]Hello lovelies and hope you are OK.

Here's a card I made using some Lavinia Stamps goodies and some Distress Inks ...


... and this is it.

So for this one, I used the Elegance stencil to make a background with Weathered Wood DI - very lightly applied - then I second generation stamped the Magic Surrounds Us words randomly before finally going around the edge of the card  with Tumbled Glass DI. 

Then I stamped the branch, fairy charms and fairy Rue over the stencilling. A stamping platform such as  the Vaessen Creative Stamp Easy really helps line everything up perfectly.

Usually I would mount this straight onto a white card blank but I went off piste here and lightly stencilled the card base with the Weathered Wood DI as well.


Once it was all in place, I added the sentiment. 


I added a bit of fairy dust (clear glitter to you and me lol)  to Rue's wings and also along the charms and I really like how this gave it a very subtle twinkle.


So there you have it. 

A quite simple card which didn't take very long but looks like you spend ages on it.

I'll list what I used here and it's all linked to where you can buy it from which I hope will help  - 


Monday, 31 January 2022

Dream


Hello lovelies.
I'm back with another card made using Lavinia Stamps products.

These are the products I used - 


Pippin Stamps


I'll list the other stuff I used as I explain how I made the card :)


So ...


.. this is what I did.

Firsty, I used the outside bit of the largest circle mask, placed in onto the card and using  a Vaessen Creative Blending Brush and Tumbled Glass Distress Ink I added the ink starting form the outside and working inwards and using less and less ink as I went.  

Once done, I swapped the outside bit of the mask for the inside bit (the complete circle) and covered up what I'd done. 

Once completed, I stamped the mushrooms, Pippin and the little stars within the circle I created at the beginning then added a bit of clear glitter around the stars


Then I placed the Berry stencil over the top and using Weathered Wood Distress Ink and a blending brush, I applied the ink through the stencil. I found that using something like a 
Wendy Vecchi Make Art Stay-tion made this easy. These are worth a look if you've never seen one - it's like an extra pair of hands and they really hold your work still.

Once completed, I stamped the mushrooms, Pippin and the little stars within the circle I created at the beginning. I used Versafine Clair Nocturne because it's nice and black. 


Then because I cannot help myself,  added a bit of clear glitter around the stars :)


I trimmed it down and mounted it onto black card then stuck it to my card base. Finally I stamped 'Dream' and stuck that down.

And my work was done!!

I made this for my friend for her birthday but she's had the card now so I'm safe to share lol.

I hope you like it and thanks for stopping by today.

Hugs, Dawny xx
 

Friday, 28 January 2022

Pretty Pink Polish


Hello lovelies and hope you are OK today.

I've been having a play with some of the gorgeous Cosmic Shimmer polishes - oh my life they're a bit nice and there's so much you can do with them.


And this is what I made.

The background was super easy. I chopped a sheet of watercolour card in half then randomly blobbed on some polishes in these colours - 


Then remember when you were at school and you squished paint between 2 bits of card? 

Well this is what I did - you get a lovely effect and always unique as no two will ever be the same.

 While it was still wet, I sprinkled on some Cosmic Shimmer Glitterbitz in Frosty Sparkle 

Then I let it dry completely.


Once it was dry, I used a one of the straight edged dies from Sue Wilson's Postage Stamp Frame Die Set to cut out a rectangle. What happens is that the die machine flattens it slightly to create a really nice effect, a bit like craters if that makes sense.


The outer postage stamp die was cut from Foundations Kraft Card.

Then I made a flower using the beautiful Sue Wilson French Marigold Die Set and applied some of the polishes before I shaped it and added some Glitterbitz over it.


A bit of string, a sentiment and some sequins and we are done.

I think it's quite pretty and totally unique because I couldn't replicate that background again if I tried :)

So that's me done for today. 
Take care and stay safe and well and see you soon.

Hugs, Dawny xx 


Saturday, 22 January 2022

Chop Chop Chop


Hello lovelies and hope you are all OK.

The card I'm sharing today was inspired by a birthday card sent to me by my crafty bestie Christine.

And ....


... this is what I did.

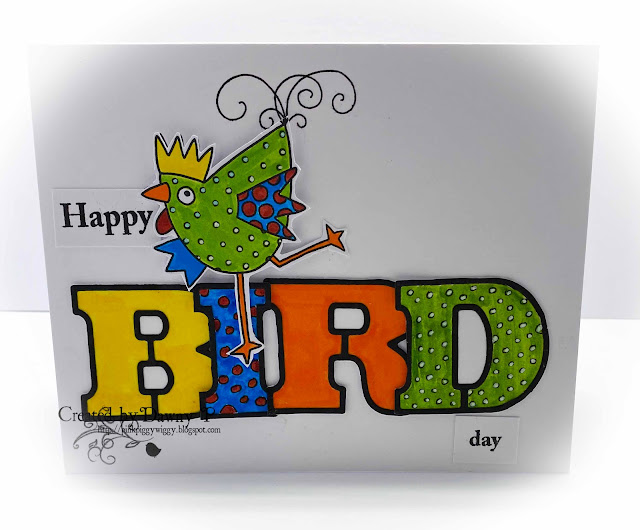
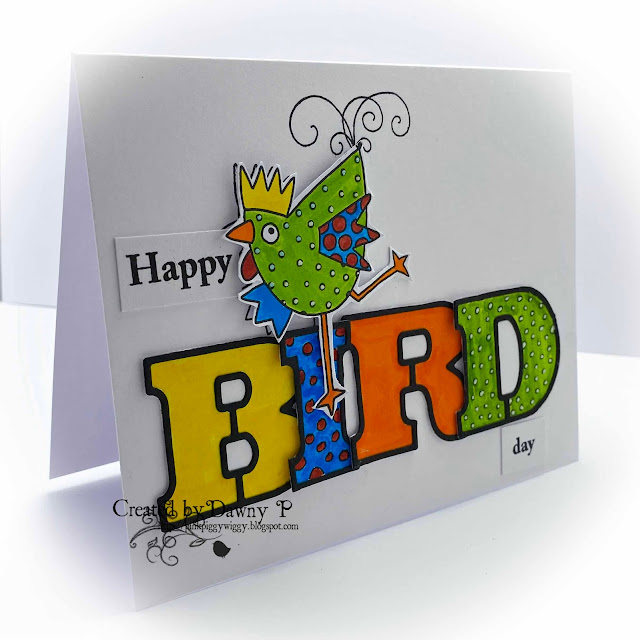
I used another Woodware stamp - this is Dancing Chickens designed by the loveliness that is Jane Gill. I coloured it very simply with Koi brush pens then cut it out.

The letters are from this die here - 


... it's the 

Birthday - Sue Wilson - Craft Die & Stamp Set


and all I did was cut out the letters I wanted and coloured them in.

Do you know how many words you can get from 'birthday'? 
It's quite a lot to be fair lol. 

If you get stuck, an on line anagram sorter will help you.


I just added some details to match the stamp and added some white Posca pen to colour them in.

Easy peasy!!

Then I stuck it all together ....


 ... like this.

This is definitely a technique I will use again. 

I hope you like my zingy funky chicken card and thank you for stopping by today.

Stay safe an well and I'll see you soon xxx