Wednesday 9 March 2016

Baby Bunting : )

Good morning crafty peeps and thank you for stopping by today.

I’ve got another baby card to share and it’s this one ….

DSCN1696 copy_thumb[3]

… here.

I wanted it to look like a chest of drawers so I used an outside edge from Tonic Topnote Trellis to cut the ‘legs’on the left hand side then made little drawers.

I think it helps to ink the edges on something like this, even though I don’t usually do it.
I used Tim Holtz Walnut Stain Distress Ink.


DSCN1698 copy_thumb[2]

The bunting is cut from the Rococo Petite Baby Balloons die and stuck together.
And the paper I used is from the Nitwits Country Meadow download.


DSCN1697 copy_thumb[3]

And the main element is the little cutie from Adorable Elephants.
The little hearts and clouds are cut from the Rococo Baby Nursery Mobile die and the sentiment is the Miniature Moments – New Baby.


DSCN1695 copy_thumb[2]

And that’s the card done.

I hope you like it and if your dies have arrived, I hope you’re having as much fun with them as I did.
Have a lovely day and crafty hugs to all xxx

Tuesday 8 March 2016

Baby Blues

Good morning crafty peeps and I hope that you are well today.

Have you been watching the Tonic baby dies shows? Aren’t they the sweetest ever?
I’ll share the cards I made for the show with you over the next few days and hope you like them.


DSCN1701 copy_thumb[3]

So here’s the first – I really love this colour palette.

DSCN1703 copy_thumb[3]

I used the Baby Rococo Petite – Rocking Horse and cut it several times before sticking it onto several layers cut from the Tonic Sew Pretty - Have a Beautiful Day Circle Frame Die set.
Hope you can see it in the picture here ….

DSCN1702 copy_thumb[2]

… and here.

DSCN1704 copy_thumb[2]

The sentiment is made from the ‘negative’ of the Rococo Petite Baby Balloons and Miniature Moments – New Baby dies. They are far too nice to throw away!!

I also used some of the dies from the Card Blank Layering – Harrop set.
They are awesome

DSCN1700 copy_thumb[2]

So that’s the first card to share and I’ll be back tomorrow with another one.
Until then, thank you for stopping by, enjoy your day and crafty hugs to all xxx

Tuesday 1 March 2016

Sew Pretty Rocker Card

Good morning lovely peeps – hope eveybody is well today.
Dopey here forgot to post my last Sew Pretty card last week!!!

So it's here now and …

… this it is.

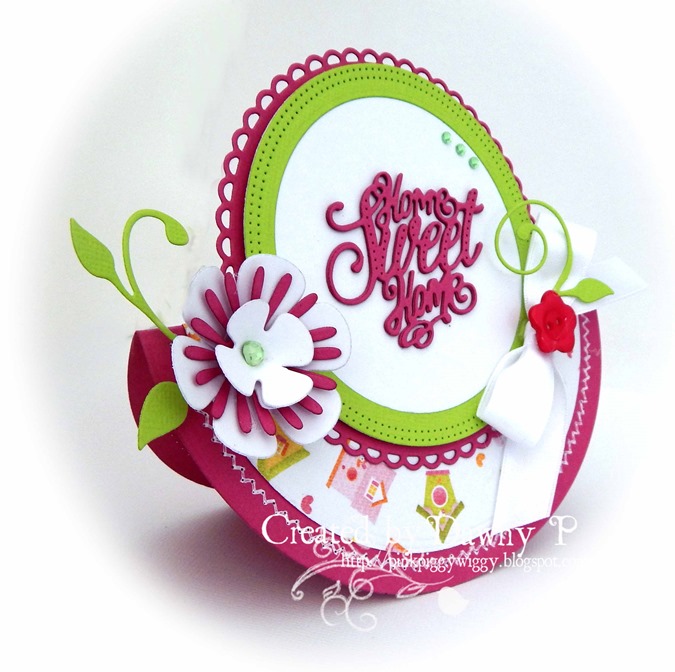
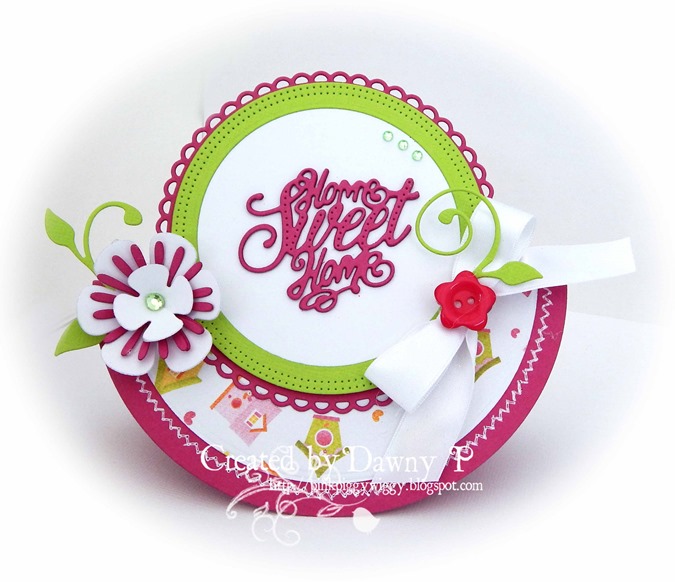
It’s a little rocker card and I used nice bright zingy springy colours for this one.

I used Tonic Sew Pretty - Have a Beautiful Day Circle Frame Die set and Tonic Pinhole Nesting Die - Layering Circle Die Set and the sentiment is from Sew Pretty - Home Sweet Home Oval Frame set.

I said yesterday that the Entwinig Trellis Bellus Buttercup was one of my favourite sets and I’ve used the flowers from that set on here – I love the shape of these, I really do.   I also added a little pink ‘stamen’ which is from the Delicate Daisy Entwining Trellis set and last but not least, a little sprig of  Tonic Studios Frond Finesse which is so fine and delicate.


A little bow, a button and some bling and we are all done – a very easy peasy card.

Have a lovely day and thank you for stopping by.

Hugs to all xxx

Monday 29 February 2016

A Go To Card

Good morning crafty friends and thank you for stopping by today.

I thought I’d share a card that I made while I was out on the road at the weekend at Farnborough,  and it was so lovely to see everybody there again.

This one uses a couple of not so new Tonic dies but they are dies which I absolutely love and which I think make the prettiest cards which can be used for most occasions – they’re what I call ‘go to’ cards.


DSCN1715 copy_thumb[2]

The main die used  is Tonic Entwing Trellis Bellus Buttercup.

You probably know that I love the little flowers in this set but this time I only used the inside edge.
I cut this from white card and then I trimmed it to leave a border.
This was then matted onto some
Tonic Essential Card Pack.
I used Magnificent Magenta but this would work in any colour.


DSCN1716 copy_thumb[2]

The little flowers were made from Simply Screens - Clematis Vine.

I just cut them out of the die cut piece.
I used 2 per flower – one was stuck down and the one on top was made by cutting in between 2 petals into the centre and then overlapping and gluing the 2 petals together.

I then topped them with a little button.

DSCN1714 copy_thumb[2]

So that’s my card and I hope you like it .

Have a lovely day and huggiest of hugs to all xxx


Sunday 21 February 2016

Card Box Tutorial


Morning lovelies.

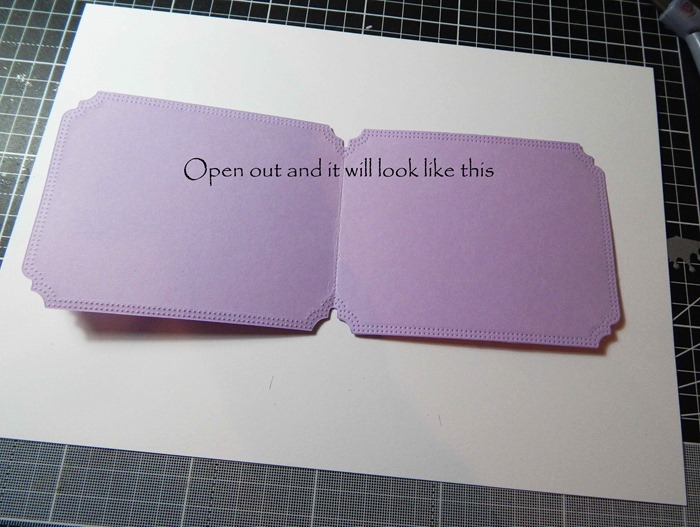
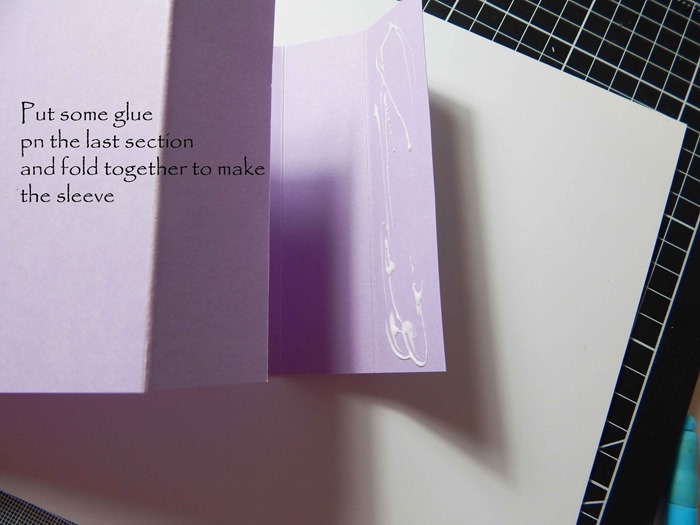
You asked me so I’ve put together a little pictorial of how to assemble the card box.

Most of us are visual learners so I hope it helps.

We are a bit pic heavy but here goes ……


So there you go – I put this together quite quickly and  I’ve spotted quite a few typos in here which I will fix when I get a sec.
Sausage fingers strikes again!!

I hope that helps and please do let me see the projects you make with it – I am a very nosey person!!

Right I am off to the NEC now.

Have a great day whatever you are doing and hugs to all xx

Friday 19 February 2016

It’s A Beautiful Day

Good morning crafty friends. 
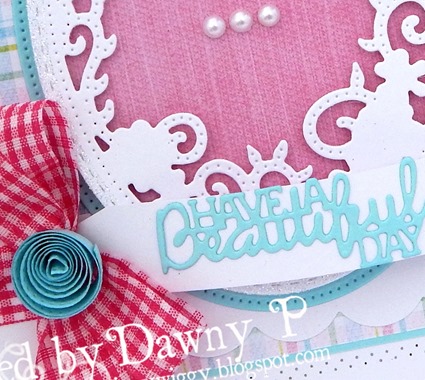
I have another card to share today and I made this one using the  Sew Pretty - Home Sweet Home Oval Frame, Sew Pretty - Have a Beautiful Day Circle Frame and Tonic Pinhole Layering Square Die Sets.


It’s a really straightforward card to put together – just a bit of matting and layering.
It’s quite a big card -  I started with an 8x8 card base.


The sentiment is from the Sew Pretty - Have a Beautiful Day Circle Frame. I just stuck it down onto some card, cut a fishtail in one end and stuck it down with my glue gun.

I made a rolled rose just for a change but this time I used the new dies so that the stitch detail was included.


So that’s it from me for today but before I go, I’ll leave you with a sneakie peekie  of my last sample card for this release…


DSCN1646sp

… and it’s this one here - very bright and zingy!!

Have a lovely day and thank you for stopping by.

Hugs to all xxx

Thursday 18 February 2016

More Than Just A Card

Good morning lovely crafty friends and thanks you for stopping by today.
I hope you are all OK and managing to stay warm. It’s a chilly one today.

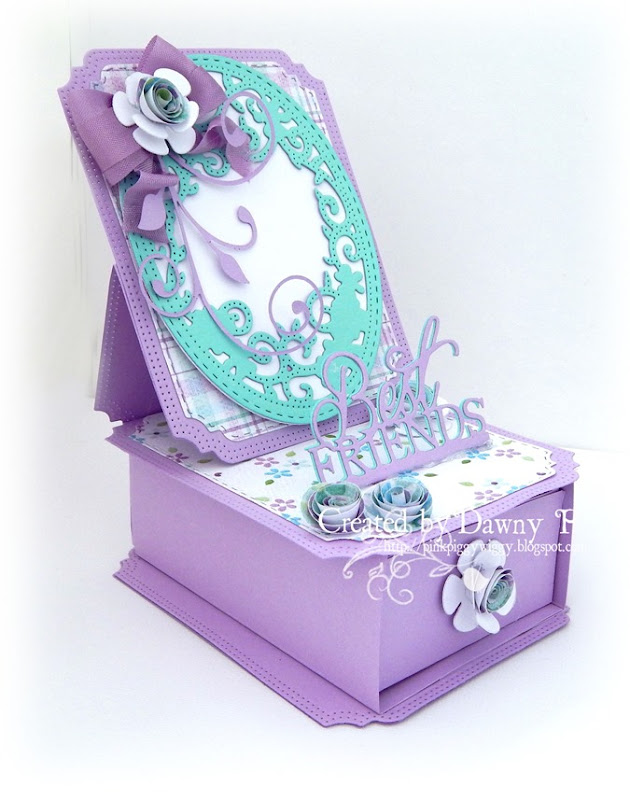
I’m back with another share and this one features the Sew Pretty- Cherish the Moment- Rectangle Frame set and also the Sew Pretty - Home Sweet Home Oval Frame set.

These sets really REALLY compliment each other.

And …

… this is what I did.
I love the colours here and I think they set off these beautiful dies so well.

So this is basically an easel card which I stuck onto a box base which was cased in a sleeve.
If I get a chance I will put together a little tutorial for this if anybody is interested.


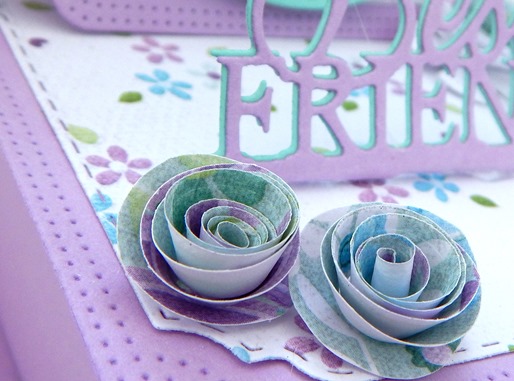
I added a double bow made with seam binding and topped it with a little bloom made using dies from the Entiwing Trellis Bellus Buttercup set (you can get this at a smashing price from Crafty Devils) and another little rolled rose made using the Layering Circles dies.

I also tucked in a bit of chopped up Frond Finesse as well – I love that swirl, it is so delicate.


The sentiment is from a recent release and this is Miniature Moments – I used Best Friends.
There is a scalloped edge and I just scored along it and this enabled it to stand up.


So there we are all done.
You could fill the box with goodies or even make some little notelets to give as a gift.

Before I go, I’ll leave you with a little sneakie peekie of tomorrow’s share and …

DSCN1650sp

… here it is.

Have a lovely day and stay warm and I’ll see you tomorrow.

Huggiest of husg to all xxx

Wednesday 17 February 2016

Pretty in Pink

Good morning lovely peeps and hope everyboidy is OK today.

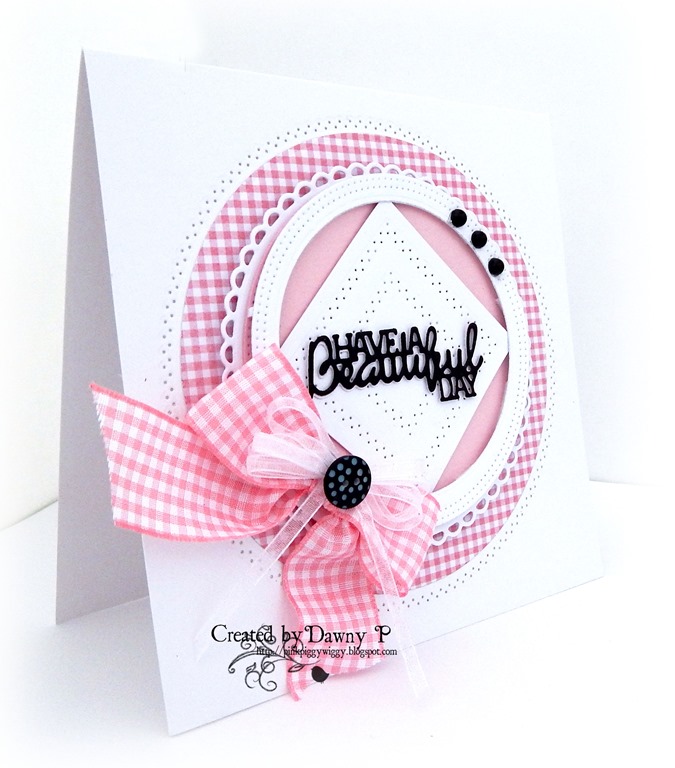
I’m back with another share which features the new Tonic Sew Pretty - Have a Beautiful Day Circle Frame Die set and Tonic Pinhole Nesting Die - Layering Circle Die Set and Tonic Pinhole Nesting Die Set - Layering Square Die Set.

I also used one of my most used Tonic sets and that is the Layering Circle Dies – soooo useful, and I really could not craft without this set.

And ….

… this is what I did.

It’s a little bit different from yesterday’s and this is I suppose typical of my style because I do like a lot of white space.
And I love  pretty things.

So let’s have a closer look : )

I love the way these sets all work so beautifully together and this is such an easy card to make, even if you are a complete beginner.

I used the Pinhole Circle die straight onto my card base then just added a plain circle of pink gingham paper.
Then I added the largest outside edge from the Have a Beautiful Day Circle Frame Die, a  smaller pink Pinhole Circle, a white frame using the Pinhole and Layering Circle dies and a simple square made with 2 sizes of Pinhole Square Dies.

The sentiment was cut from black and pink cardstock and they were glued together, slightly offset.
Finally I added some bows (
25mm Pink No 57 Small Check Gingham from The Ribbon Girl ), a double narrow white organza bow, a small black polka dot button, again from The Ribbon Girl and some Ebony Black Nuvo Drops from Crafty Devils  to pick up the colour from the button.

And that’s it – very easy peasy!!

I’m off now but I’ll leave you with a sneakie peekie of tomorrow’s share, which is again a bit different ….

DSCN1655sp

… and I LOVE the colour combi on this one.

See you tomorrow and have a fabuous crafty day.

Hugs to all xxx

Tuesday 16 February 2016

Pretty Metallic


Good morning crafty friends and I hope that everybody is OK today.

Tonic Studios have some truly gorgeous new dies which are  launching today at 2pm and these are called Sew Pretty.

They really are just that.

I will be sharing these with you over the next few days and to start off, I have chosen …..


DSCN1644 copy_thumb[2]

… this one here.


DSCN1641 copy_thumb[2]


The die is Sew Pretty- Cherish the Moment- Rectangle Frame and what I did was to cut the smaller die three times using black card from the Tonic Studios Monochrome Card Pack which you can get from Crafty Devils  Then I glued them all together so that it made a raised and sturdy piece.


Now when I was at Manchester a few weekends ago, I was having a play with the Double Detail dies and Embellishment Mousses and although it isn’t usually my ‘thing’, I was blown away by them all. So I decided to rub some of the Pure Platinum mousse over the top die cut piece and I loved how it gave it a real metallic look.  It looks like it should be really heavy I think but of course it isn’t.

The card works so well with the mousse because of its texture.


DSCN1642 copy_thumb[3]


So that’s my card and I’ll be back tomorrow with another one – something ever so slightly different!!

Don’t forget to catch the show and enjoy the rest of your day, whatever you’re doing.

Crafty hugs,

Dawny xx

Tuesday 19 January 2016

Who Was The Winner?

Hi lovely peeps.

As promised, I’ve drawn my winner today and I am pleased to tell you that  …….

image

… it’s you Karen P.

Please email me  and I’ll let you know what you need to do to claim your prize.

Thanks to everybody who entered as well and huggiest of hugs to all xxx

Wednesday 6 January 2016

At Last!!!!

Good morning crafty friends and firstly, a very happy new year.
Here’s to a wonderful 2016 and I hope that you are all safe and dry following the awful floods that have hit the UK.

Hugest apologies that I haven’t posted for quite a while - I have had real problems using Livewriter.
I’ve managed to fix it now, which is no mean feat for somebody who is as technically challenged as me!!!
So I am back in the land of the living, yayyyy.

There’s been a lot going on for sure, including losing Richard’s Mum and closing papertake after almost 8 years.
It was a very tough decision to make but my head tells me it was the right thing to do. My heart however …….. : (

Now, on the last Papertake Challenge, I said that I was going to do a giveaway and you can finds the details at the end of this post -  apols that it’s late but better late than never I guess xx

OK, enough waffle, what have  I got to share today?

Well this is one of my cards from the fantastic Tonic Studios Pampered Pets release.
Oh my, they are going to be so useful – and …..
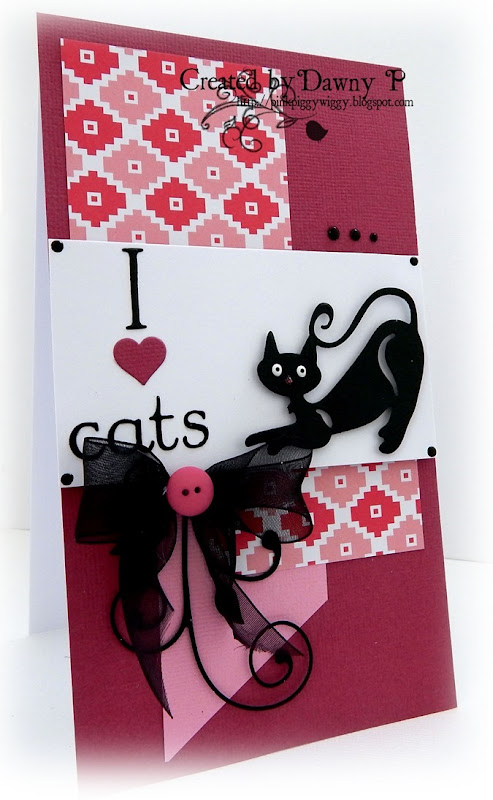
DSCN1623-copy_thumb2

… this is what I did.
The sweet little kitty is Kittens Whiskers and it was cut using black card from an Essential Card Pack – Monochrome.
DSCN1624-copy_thumb8

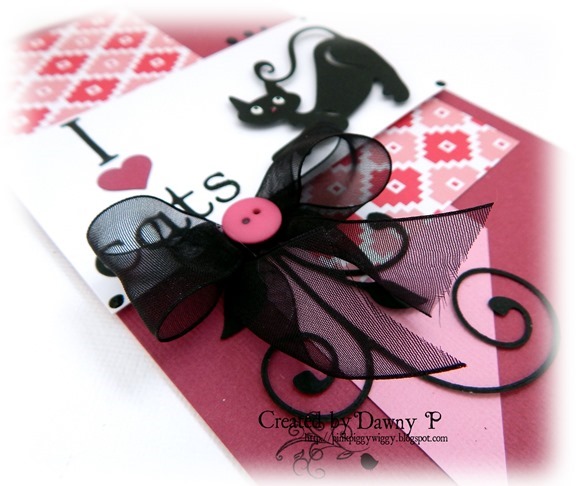
I added some Tonic Nuvo Drops to make his eyes (Pearl White with the tiniest bit of Ebony Black on top, and  thank you Edna for this brilliant tip) and a tiny bit of  Sherbert Shimmer Nuvo Glitter Drops for his nose. The sentiment was made using Clarice Alphabet dies – upper and lower case sets, and the little heart is from Tonic Studios Expressions Sentiment Set - Live, Love, Treasure, Laugh – 368E.

The gorgeous swirl is Tonic Studios Frond Finesse.
I really like this swirl, it’s so delicate and very versatile because  you can chop it about

Other Tonic products used are Magnificent Magenta card and the paper is from Tonic Studios Simply Patterns

DSCN1622-copy_thumb4

OK, I did say at the beginning that I had a little giveaway  so if you entered the last ever Papertake challenge and want to win a


£10 Papercraft Gift Voucher to spend at the fabulous Crafty Devils shop

PLUS a

Gift Voucher 10

£10 voucher to spend at the fabulous Ribbon Girl shop, then please just leave your name with Linky at the bottom with the link to your Papertake Card and I’ll draw a winner in 2 weeks time.

So that’s me done and I’ll see you back here very soon.

Enjoy your day, stay warm and dry and happy crafting xxx